
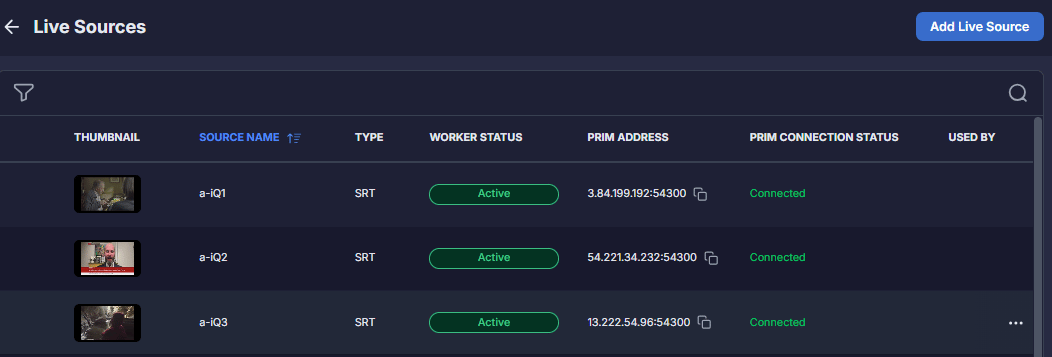
The Live Sources list
Each row is one live source.
A redundant source carries a second connection. Double-click its row to expand it and reveal the Sec Address and Sec Connection Status columns for that connection.
Worker Status values
Active means the source is ready to receive a stream — not that one is arriving. Whether a stream is actually arriving is the separate Connection Status.
Connection Status values
What you can do in each status
A source must be deactivated before it can be edited or deleted, and deactivating is blocked while the source is still activating.
Filter Live Sources
To filter the list of live sources:- Click the Filter icon and do one of the following:
- To display only live sources that use the Secure Reliable Transport (SRT) protocol: Expand the Type section and click SRT.
- To filter the list by worker status: Expand the Worker Status section and select Active, Inactive, Error, Pending, or Stopping.
- To filter the list by connection status, expand the Connection Status section and select one of the following: Connected, Disconnected, or Waiting.
- Click Apply.
Search for a Live Source
To search for a live source, click the Search icon and type some or all of a source name. Only source names are matched.Sort Live Sources
You can click the Source Name heading to sort the source list by source name. Click it again to reverse the order. Other columns cannot be sorted.Copy a Primary Address
To copy a source’s primary address, click the Copy icon beside the primary address.
A primary address exists only for a source in Listener mode, and only while the source is active — it is assigned on activation and cleared on deactivation. A source in Caller mode connects out to an address you supply, so it has none to copy.
Add a Live Source
The Add Live Source panel has two steps: General Info and Stream Settings.- Click Add Live Source.
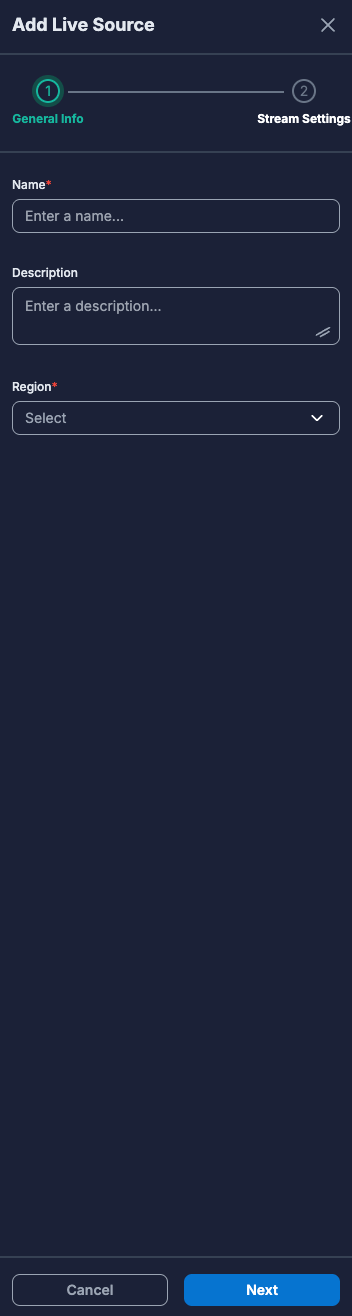
- In the Name box, type a name for the source. Names are between 3 and 255 characters.
- (Optional) In the Description box, type a description of the source.
- From the Region list, select the region.
- Click Next.
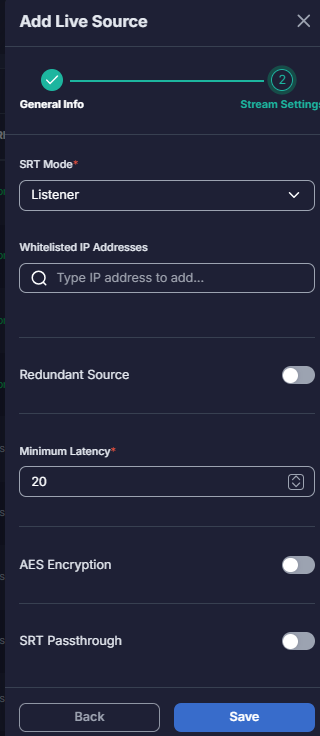
- From the SRT Mode list, select Listener or Caller. The fields that follow depend on this choice.
- Listener — UP assigns an address and waits for an encoder to connect to it.
- Caller — UP connects out to an address you supply.
- Complete the fields for the mode you chose.
- (Optional) To configure this as a redundant source, turn on the Redundant Source toggle. In Caller mode, also supply the Secondary IP Address and Secondary Port for the second connection.
- In the Minimum Latency box, type or select the minimum latency in milliseconds, between 20 and 8000. The default is 20.
- (Optional) To enable AES Encryption, turn on the AES Encryption toggle, then set:
- (Optional) To enable SRT Passthrough, turn on the SRT Passthrough toggle, then set:
- Click Save.
View Source Details
To view the details for a live source:- Click the Action icon (…) to the right of the source and select View Details.
- On the Preview tab, UP displays a live preview of the source’s stream.
On the audio bar graph, click S beside a channel number to listen to only that channel, or click M to mute it. All channels start muted. To view information about the audio track, expand the Audio Track section. The Text Tracks section lists the number of text tracks on the audio stream.
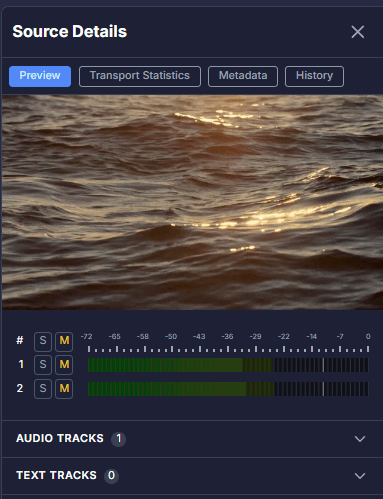
- Click the Transport Statistics tab to view transport stream statistics. A redundant source shows primary and secondary statistics side by side.
- Click the Passthrough Statistics tab to view statistics for the passthrough stream. This tab appears only when SRT Passthrough is enabled on the source.
- Click the Metadata tab to view channel stream information.
- Click the History tab to view the dates and times that the live source was connected and disconnected.
The Preview, Transport Statistics, Passthrough Statistics, and Metadata tabs show data only while the source is Active. On an inactive source they show a disconnected placeholder. The History tab works in any status.
Modify a Live Source
A source can only be modified while it is Inactive. Deactivate it first.- Click the Action icon (…) to the right of the source and select Edit.
- Modify the source as necessary and click Save.
Activate a Live Source
After you create a live source, it is inactive. To activate it, click the Action icon (…) to the right of the source and select Activate. The source moves to Pending while its ingest capacity is provisioned, then to Active, at which point its primary address is published and it can accept a connection.Deactivate a Live Source
To deactivate a live source, click the Action icon (…) to the right of the source and select Deactivate. Deactivating releases the source’s ingest capacity and clears its addresses, connection state, and stream metadata. It is available while the source is Active or Pending.Delete a Live Source
A source can only be deleted while it is Inactive. Deactivate it first.- Click the Action icon (…) to the right of the source and select Delete.
- Click Delete to confirm that you want to delete the source. This action cannot be undone.